How to Upload a File to ChatGPT: A Step-Step Guide(2024)
Table of Contents
Introduction:
In brand new digital age, communication has developed drastically, with synthetic intelligence (AI) becoming an integral part of our interactions. ChatGPT, powered by using OpenAI’s modern-day era, enables seamless communique and assists users in various responsibilities. Users can add documents to decorate communication or are trying to find assist on particular topics, little by little.
Step 1: Access the ChatGPT Platform
To start, you want to get admission to the platform where ChatGPT is available for interplay. This may be through the internet site, an software, or some other platform that integrates ChatGPT’s abilties.
Step 2: Initiate a Chat Session
Once you’re on the ChatGPT platform, provoke a chat consultation through selecting the suitable alternative. This would possibly contain clicking on a chat icon or button labeled “Chat with ChatGPT” or something similar, depending on the platform’s interface.
Step 3: Start the Conversation
After beginning the chat session, ChatGPT will commonly greet you with a welcoming message or activate. You can start the communique with the aid of typing your question or message inside the supplied textual content enter area.
Step 4: Locate the File Upload Option
To add a record to ChatGPT, you need to locate the file upload choice within the chat interface. This choice may be represented through an icon similar to a paperclip or an “Upload” button, depending at the platform’s layout.
Step 5: Click on the File Upload Option
Once you have placed the document add alternative, click on it to open the report selection dialog box. This conversation box allows you to browse your device’s documents and pick out the record you want to upload.
step 6: Select the File
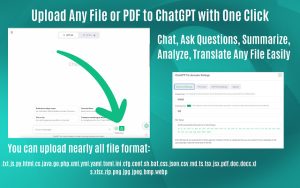
In the record choice dialog box, navigate to the area wherein the report you want to add is saved. Click at the record to choose it. Depending on the platform, you may be capable of upload diverse report types, consisting of pictures, documents, audio files, and greater.
Step 7: Confirm the Upload
After selecting the document, affirm your selection by clicking on the precise button inside the dialog container. This motion will provoke the file add system, and you should see a progress indicator indicating the upload fame.Step 8: Wait for Upload Completion**
Depending at the document size and your net connection pace, the add process can also take some time. Wait patiently for the upload to finish, and avoid navigating faraway from the web page or last the chat session all through this time.
Step 9:Receive Confirmation
Once you complete importing the file, ChatGPT will send you a confirmation message indicating that the document had been successfully uploaded. Subsequently, you may continue along with your verbal exchange or any other movements you meant to take.
Step 10: Engage with ChatGPT
With the file efficiently uploaded, you may now interact with ChatGPT regarding its content or every other queries you may have. ChatGPT can provide insights, analysis, or assistance based on the uploaded document’s content, improving the software of your interplay.
Conclusion
Uploading files to ChatGPT is a powerful tool that enhances conversations and aids in looking for help. Follow the manual to effortlessly upload files and maximize ChatGPT‘s competencies for a richer verbal exchange enjoy.Whether you’re sharing files, pics, or other media, ChatGPT is ready to assist you in maximizing your interactions.